Showing posts with label baking. Show all posts

Tuesday, April 6, 2010

Breakfast Pizza and Pineapple Biscuits...

Delicious!!!!
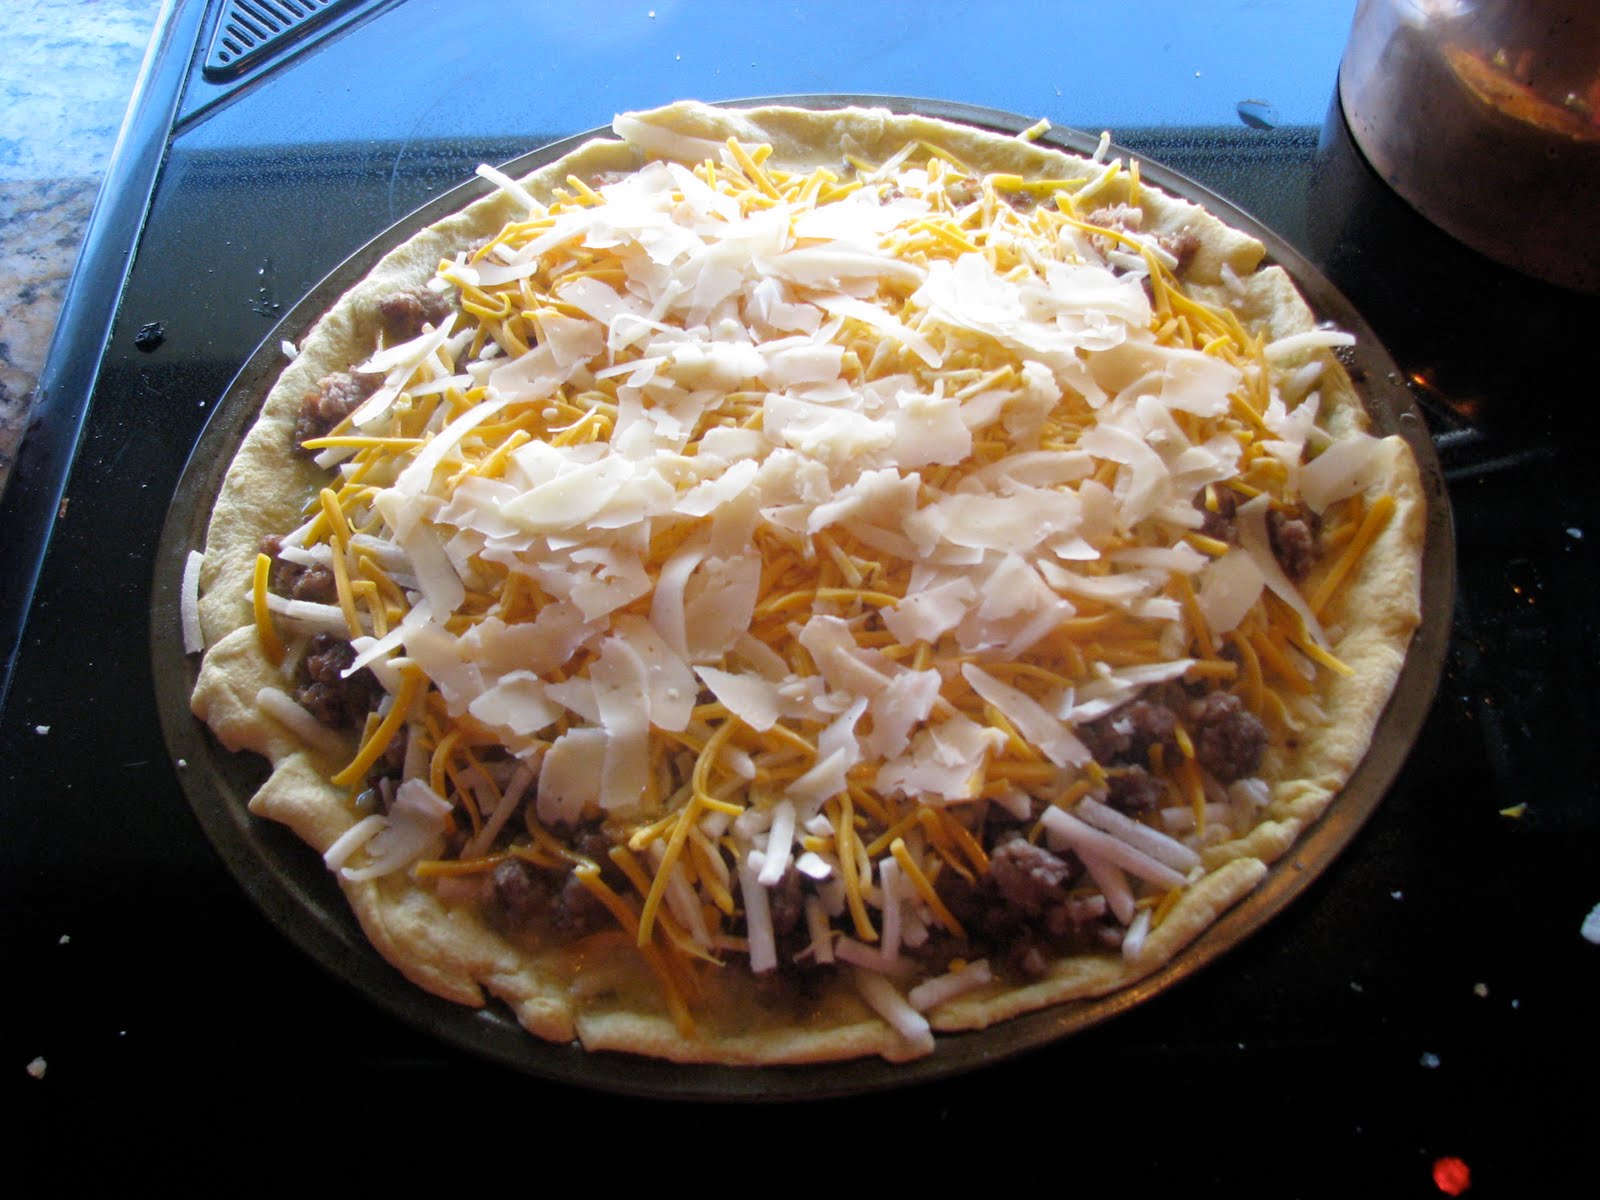
Usually we have an Easter brunch instead of an Easter dinner. But this year we decided to have more of a traditional Easter dinner so we made a simple breakfast instead of brunch. We had 2 things that were AMAZINGLY good! Breakfast Pizza and Pineapple Upside Down Biscuits...Yum, yum:-)
We all loved the pizza. Usually, we have an egg/sausage casserole but a few of us think it is sometimes a little soggy with the bread on the bottom. This wasn't soggy at all. We made a few tiny changes and will include them in the recipe. Originally, this was a Taste of Home recipe...we think:-)
Breakfast Pizza Ingredients
1 (8 ounce) can refrigerated crescent rolls
1 pound bulk pork sausage (we used maple flavor. Sage would be good too.)
1/4 cup onions (if you like)
1 cup frozen shredded hash brown potatoes, thawed
1 cup shredded Cheddar cheese
3 eggs (perfect amount...don't worry)
1/4 cup milk
1/4 teaspoon pepper
pinch of salt
1/4 cup grated Parmesan cheese
Directions
Unroll crescent dough and place on a greased 12-in. pizza pan; press seams together and press up sides of pan to form a crust. ***We pre-baked the crust for 6 minutes to make sure it was cooked well...and it was PERFECT.
In a skillet, brown sausage and onions over medium heat; drain and cool slightly.
Sprinkle sausage, hash browns and cheddar cheese over crust. In a bowl, beat eggs, milk and pepper; pour over pizza. Sprinkle with Parmesan cheese.
Bake at 375 degrees for 28-30 minutes or until golden brown. (27 minutes was perfect in our oven. After 20, we covered the crust with foil as it was getting too brown. Turned out perfect!)
Let stand 10 minutes before cutting. Serves 8
*Don't worry if the crust is kind of thin. Just make sure the whole pan is covered and form a crust so your toppings don't overflow.
**We added the onions for flavor. Next time we might throw on some red peppers or bacon. Basically, you can add whatever you like in an omelet. Our mom thinks it would be great with bacon, mushrooms and swiss cheese...but no thanks:-)
Now for the biscuits... Do you like Pineapple Upside Down cake? We don't...but for some reason we LOVED these biscuits:-) Yes, the recipe is one of Paula Deen's. Maybe not the healthiest cook in America... but every once in awhile, we all need to splurge, right? Go ahead...have one!
Pineapple Upside Down Biscuits by Paula Deen
Ingredients 1 (10-ounce) can crushed pineapple
1/2 cup packed light brown sugar
1/4 cup (1/2 stick butter), at room temperature (we cut this amount almost in half)
10 maraschino cherries
1 (12-ounce) package refrigerated buttermilk biscuits (10 count)

Directions

Preheat the oven to 400 degrees F.

Grease 10 cups of a muffin tin. Strain the can of crushed pineapple, save juice for later.

Combine the pineapple, sugar, and butter, and mix well. Divide the pineapple mixture among the muffin cups.

Place a cherry in the center of each muffin cup, making sure cherry hits bottom of cup.

Place 1 biscuit in each cup on top of sugar and pineapple mixture.

Spoon 1 teaspoon reserved pineapple juice over each biscuit.

Bake for 12 to 15 minutes, or until golden.

Cool for 2 minutes.

Invert the pan onto a plate to release the biscuits. (we used a cookie sheet) Serve warm.

So that's it from our kitchen today.

These 2 recipes will be a big hit when you make them. They were for us:-) And here is a pic of our favorite Easter Bunnies... Happy Belated Easter from the Blondes in the Kitchen! XOXOXO

Sunday, February 14, 2010

Red Velvet...

... Whoopie Pies. What could be a better treat for valentines day than red velvet whoopie pies? These look so good. We haven't made these yet... but we will. Happy Valentines Day from The Blondes in the Kitchen!

Red Velvet Whoopie Pies

Makes 30 sandwiches

Cake: 2 cups (9.5-10 ounces) unbleached flour* 2 tablespoons cocoa powder (not Dutch processed) ½ teaspoon baking powder ¼ teaspoon salt 8 tablespoons (1 stick) butter, softened 1 cup (7 ounces) packed light brown sugar 1 egg, preferably room temperature 1 teaspoon vanilla extract ½ cup buttermilk, preferably room temperature 1 ounce (2 tablespoons) red food coloring

Filling: 4 ounces cream cheese, softened 4 tablespoons (½ stick) butter, softened 2 cups (8 ounces) powdered sugar ½ teaspoon vanilla

1. Adjust oven rack to middle position; preheat oven to 375F. Line baking sheets with parchment paper. In medium bowl, whisk together flour, cocoa, baking powder and salt.

2. In large mixing bowl, beat butter on medium-high speed for 30 seconds, until smooth. Add brown sugar and beat until light and fluffy, about 2 minutes. With mixer at medium speed, add egg and beat until thoroughly combined, then beat in vanilla. Add about one-third of flour mixture followed by half of buttermilk mixture, mixing until incorporated after each addition (about 15 seconds). Repeat using half of remaining flour mixture and all of remaining buttermilk mixture. Scrape down sides of bowl and add remaining flour mixture; mix at medium-low speed until batter is thoroughly combined, about 15 seconds. Remove bowl from mixer and fold batter once or twice with rubber spatula to incorporate any remaining flour.

3. Spoon (or pipe) batter in 1-inch diameter rounds about ½-inch high on prepared baking sheets, allowing 1 inch between each round.

4. Bake 7 to 9 minutes, or until tops are set. Cool cookies on cookie sheets.

5. To make filling: Add cream cheese and butter to mixer bowl and beat until smooth. Gradually add powdered sugar, alternating with vanilla. Beat until smooth.

6. To fill, dollop (or pipe) cream cheese filling on flat sides of half the cookies. Top with remaining cookies, flat sides down.

To store: Refrigerate in airtight container up to 4 days. Let stand at room temperature 15 minutes before serving.

Source: Dinners and Desserts

Wednesday, October 14, 2009

Tollhouse Cookie Bars...So Good!

So we were watching the Florida Gators on Saturday Night... (Go Gators...GO TEBOW!!!) and our Dad asked us to make Nestles Tollhouse Cookie Bars. We make chocolate chip cookies ALL THE TIME but we couldn't remember having them in a bar. He had them like that when he was a kid so we went to the store, bought a bag of choc. chips and made them. OMG...these were amazing!!!!! We might never make regular cookies again. So if you're looking for a quick, easy, delicious dessert or snack, make a pan of these. We just followed the directions on the back, except we used a 9 x 13 cake pan instead of a 10 x 15 jelly roll pan. This made them thicker...and we think they're better!:-) Ciao!

Tuesday, October 13, 2009

Cranberry Coffee Cake

This is delicious and great for the Holidays. One of our neighbors made it for us a few years ago and now it is one of our favorites. It is really moist and the funny part is...we don't even like cranberries! But we love this so try it and see what you think. Please visit Beauty and Bedlam for more Tasty Tuesday recipes and thanks for stopping by our blog!
Cranberry Coffee Cake
INGREDIENTS • 1/2 cup butter or margarine, softened • 1/2 cup sugar • 2 eggs • 1 teaspoon vanilla extract • 2 cups all-purpose flour • 2 teaspoons baking powder • 1 teaspoon ground cinnamon • 1/4 teaspoon salt • 1/8 teaspoon allspice • 2 medium ripe bananas, mashed • 1 cup whole berry cranberry sauce (We added a small amount of mik to the batter because it seemed a little bit dry and it turned out perfect!) • TOPPING: • 1/2 cup packed brown sugar • 1/2 cup chopped pecans • 2 tablespoons all-purpose flour • 2 tablespoons butter or margarine, melted
DIRECTIONS 1. In a large mixing bowl, cream the butter and sugar. Beat in eggs and vanilla. Combine the dry ingredients; add to the creamed mixture alternately with bananas. Spread into a greased 13-in. x 9-in. x 2-in. baking pan. Top with cranberry sauce. (Sometimes we use a large square pan for a thicker cake) 2. In a small bowl, combine brown sugar, pecans (optional...we didn't) and flour; stir in butter. Sprinkle over cranberries. Bake at 350 degrees F for 45-50 minutes or until a toothpick inserted near the center comes out clean. Cool in pan on a wire rack. Enjoy!!! Ciao...Taylor & Jordan

Monday, October 12, 2009

Red Velvet Cake Balls...

In August, we were in the Keys for our mom's birthday. It was so much fun and for her birthday, we went to dinner and bought a cake to have later. The cake was great but we usually give my mom a homemade cake, not a store bought one. So a few weeks after we got home, we made these red velvet cake balls to surprise her. You can find the recipe on Bakerella which is an AMAZING site for unbelievable baking recipes. Okay, we decided to do this at the last minute so we had to do things differently from the recipe. We made a red velvet cake from scratch and since we had no baking chocolate in the house, we melted chocolate chips. It wasnt what the recipe called for but it's all we had. They were soooooo good! Even our dad, who doesn't eat a ton of chocolate loved them. They were gone so fast...almost by breakfast the next day! Next time we make them and we are planning to for Christmas, we'll use white chocolate too. We'll drizzle a few lines of white chocolate over the dark chocolate and we'll totally cover some of the cake balls in only white chocolate. These are one of the best tasting things we've made in a long time! Ciao! Taylor & Jordie